

How to measure a steel-framed window step by step
Start with a steel tape, not a cloth tape and not a laser guess. Slim steel frames leave very little room for error, and a few millimetres either way decides whether a shutter sits neatly or fouls a handle. Write everything down in millimetres, and note the window's room and position as you go.
Measure the opening
For an inside-the-recess fit, take the width at the top, middle and bottom, then the height at the left, centre and right. Steel windows, especially older Crittall ones, are rarely identical from one measurement to the next. Record all six figures rather than just the smallest.
For a face fit, you are measuring something different: the wall area the frame will cover. Measure the opening itself, then the surround. You need clear, flat wall or plaster at the sides and above, usually 50 to 100mm, for the frame to fix to. Check for light switches, picture rails, coving and uneven plaster inside that zone.
Check squareness and obstructions
Measure both diagonals, corner to corner. If they differ by more than a few millimetres, the frame is out of square, which is common on older Crittall windows where the building has moved. In that case the shutter should be built to the narrowest point, with any gap tidied at the edges.
Then note everything that gets in the way:
- Window stays, handles and espagnolette bolts, and how far each one projects into the room
- The sill depth, and whether it is stone, tile or timber
- Radiators or pipework beneath the window
- Whether the casements open inwards or outwards
Outward-opening casements are easier, because nothing swings into the shutter's path. Inward-opening ones need the shutter to clear the sash when it is open, or to be fitted so you can close the shutter, then reach the handle.
Take the depth readings
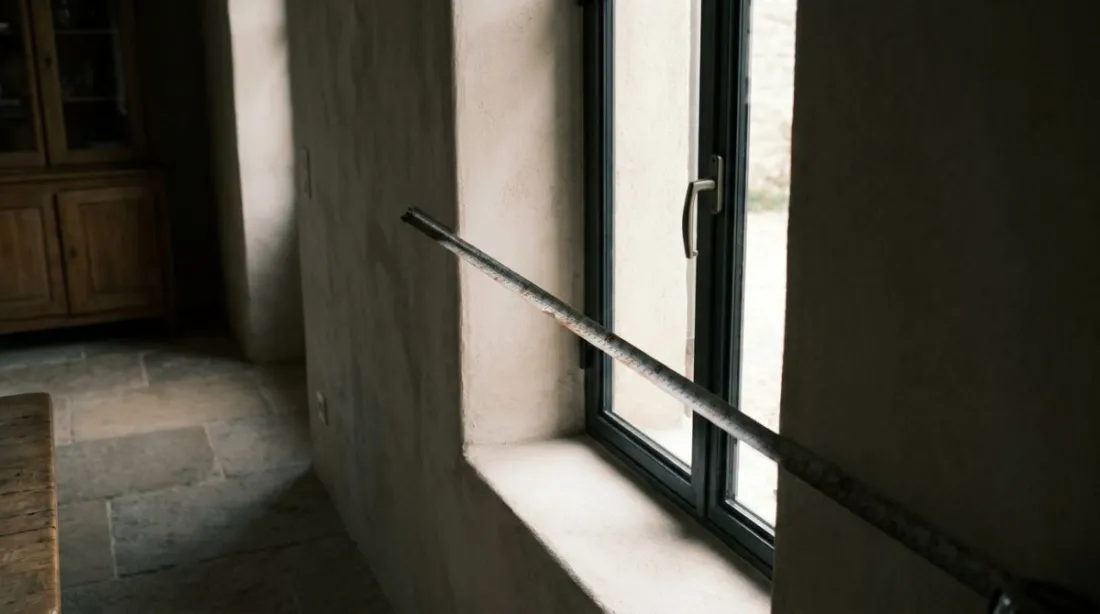
Depth is the measurement people skip, and it is the one that most often decides the mounting. Hold a straight edge, such as a metal rule or a spirit level, flat across the wall on either side of the opening. Then measure from the underside of that edge back to the nearest part of the window, whether that is the frame, a glazing bar or the glass. Do it at the top, at both sides and at the sill, because plaster returns are rarely even.
Next, measure the biggest obstruction separately. That is usually the handle, and you want its projection with the handle turned to the open position as well as locked, since that is when it sticks out furthest. Subtract that figure from the reveal depth and you have the free depth available for a shutter.
A typical shutter panel is around 32mm thick. The louvres also need a few millimetres to tilt without catching, and the hinges take up a little more. As a rough working guide, an inside fit needs something like 50 to 60mm of free depth, but the exact figure varies by range and hinge type, so ask for it before you commit.
Photograph and label
Take a photo of each window with the tape visible across it, and label each by room. It costs a minute and settles most queries before anything is manufactured. It is also the same record our team uses at a free design visit, so you can compare your figures with theirs.
A worked example
Take a Crittall-style window measuring 1,200mm wide by 1,500mm high, with a 35mm reveal and a handle that projects 30mm. The handle leaves only 5mm between its tip and the front of the recess. A shutter panel is considerably thicker than that, so an inside fit simply will not close.
This leads to a face fit. The frame goes on the wall around the opening, so the handle has all the clearance it needs. You would then check there is, say, 75mm of clear plaster on each side and above, which comfortably meets the 50 to 100mm needed for fixing.
A second example with a deeper reveal
Now take a steel window set into a 330mm solid brick wall, with a 100mm reveal and the same 30mm handle. The free depth is 100mm minus 30mm, so 70mm. A 32mm panel plus hinge and tilt clearance sits inside that with a margin to spare, and the shutter can go inside the recess, leaving the wall face completely clear. The width then becomes the critical figure. If the narrowest of your three width readings is 1,184mm, the shutter is built to that, with a small gap on each side for the finishing, and the 16mm wider reading at the top simply becomes a slightly larger shadow gap.
Face fit, inside fit or something in between: choosing the mounting
The measurements usually answer this question for you. Still, it helps to know what each option involves, because they look and behave differently once they are on the wall.
Face fit
With a face fit, a frame is fixed to the wall or surround around the opening. It is often an L-frame style, with the shutter panels hinged inside it. This suits the shallow reveals typical of steel windows, and it avoids drilling into the metal at all. It also lets the shutter clear handles and stays without fuss. The trade-off is that the frame is visible on the wall, so you need a tidy surround and a decision about how it finishes at the edges.
Inside fit
An inside fit places the shutter within the recess. It looks neat and keeps the wall clear, but it needs enough depth, and it has to clear every handle and stay with room to spare. If your reveal is 35mm and your hardware sticks out 30mm, as in the example above, it is a non-starter. Deeper reveals, such as those on a Crittall window set into a thick masonry wall, can work well.
L-frame or Z-frame
The frame profile changes how the shutter sits against the wall. An L-frame is a simple right-angle section that sits flat on the surround and gives a clean border. A Z-frame has a lip that tucks against the wall or into the reveal, which can help disguise slightly uneven plaster. Which suits you depends on how flat your walls are and how much edge you want to see, so ask for a sample corner if you are unsure.
What you fix into
Drilling into thin steel, or into thermally broken frames, is generally avoided. It can compromise the frame and its seals, and the metal is too slim to hold a screw well. Fixings go into plaster, brick or block, or into timber battens set around the frame. If the wall is plasterboard, the fitter will usually locate studs or add battens first, so mention it when you measure.
Why perfect fit is not the answer
Perfect fit shutters clip into UPVC beads, which is why you see them sold as no-drill. They are made for compatible uPVC windows and do not generally suit slim steel profiles, which have no bead to grip. So if a quote for your Crittall windows offers perfect fit, ask how it would actually attach.
Tall or wide windows
Large glazed areas are often split into tiers or panels. A 2.4m-high steel window with one big shutter panel would be heavy and awkward, and the hinges would struggle. Splitting it into tiers spreads the weight, keeps each section moving smoothly, and lets you open the lower part for ventilation while leaving the top tilted.
Original steel, thermally broken and Crittall-style aluminium
Not every slim black frame is the same, and the differences affect the fit. Original steel windows from the 1920s and 30s have very fine sections and are often set well back in the wall, but they may be rusty or distorted. Modern thermally broken steel frames are deeper in section and tend to have neater, flatter handles. Crittall-style aluminium windows look similar from across the room, yet their handles and hinges can project differently. Check what you actually have, and measure the hardware on each window rather than assuming they match, since a house with mixed replacements is common.
Corner windows and steel doors
Steel is popular for wraparound corner windows and for glazed internal screens and French doors. On a corner window, the two runs meet at a slim post, and the shutter panels on each side need to fold back without colliding with each other or the post. That often means a corner post or a carefully planned hinge side, so measure each run separately and describe how the two meet.
On steel doors, the door must still swing. Measure the handle projection and the door's opening arc, and decide whether the shutter should be fixed to the door, or sit on the wall beside it. A shutter that makes a door awkward to use will be irritating within a week.
Mistakes that lead to a remake, and what they cost
Bespoke shutters cannot be returned or trimmed on site by much, so an error at measuring stage tends to mean making a panel again and waiting for it. A few mistakes cause most of the trouble.
- Measuring to the glass instead of the frame. Glass sits inside the steel, so the figures differ by the width of the frame. Decide where the shutter's edge is meant to land, then measure to that point.
- Checking the handle only when locked. A handle turned to open projects further, and it is the open position that tends to catch the shutter.
- Measuring before the work around the window is finished. New plaster, a new sill or fresh coving can shift your usable depth or the clear wall area by 10 to 20mm. Wait until it is done.
- Trusting one reading. One width taken at the widest point means a gap that looks wrong, or a panel that will not go in at the narrowest point.
- Ignoring a sloping sill. Stone sills often fall away towards the glass, which changes where the bottom of an inside-fit frame sits.
The cost is rarely just the panel. There is the wait while a replacement is made, usually a matter of weeks, and a second visit from the fitters. A slow, cross-checked measure is far cheaper than any of that.
Choosing a look that respects the metalwork
Steel windows are defined by their fine lines, so the best shutters are the ones that do not compete. Keep the design simple and let the glazing bars stay the star.
Louvre size and colour
Slimmer louvres, usually 47mm or 63mm, echo thin glazing bars better than wide 89mm or 114mm louvres, which can look heavy against a delicate grid. White and soft off-white are classic and keep things calm. Black or charcoal frames and shutters can mirror the steel and give a deliberate, contrasting look, though it works best when the room is bright enough to carry it.
Line up the grid
Where practical, align shutter divisions, or tier splits, with the horizontal glazing bars. When the lines carry through, the shutter and window read as one design. If they land halfway between bars, the eye notices. This is worth raising before manufacture, since a split moved by 40mm can make a lot of difference.
Café-style shutters, covering only the lower half, are another good fit. They let light in through the top panes and keep the upper steel pattern visible, while giving privacy at street level. You can see how they compare with other layouts on our shutter styles page.
Tilt rods
Against fine bars, a central tilt rod adds a vertical line that can look busy. A hidden tilt rod gives a cleaner louvre face, while a clear tilt rod sits somewhere between. Which you choose is a matter of taste, but fewer visible parts generally suits steel.
Material matters in wet rooms
Steel frames can attract condensation, and that matters most in kitchens and bathrooms. Real wood looks lovely and suits living rooms and bedrooms. For damp spaces, moisture-resistant composites are the more practical choice, since they will not swell or warp. Our Georgia range, for instance, uses engineered wood panels with polymer louvres for exactly that reason.
Light, warmth and privacy, and what to expect on fitting day
Steel-framed glazing often runs cold, and the glass is frequently single or thinly double glazed. Closed shutters add a layer in front of it, which can make a room feel more comfortable on a winter evening. They do not turn single glazing into double glazing, so treat them as a comfort improvement rather than a replacement for better glass.
One habit is worth building in. Cold single glazing is where condensation forms first, and a closed shutter traps a pocket of still air against it. On frosty mornings, open the panels or tilt the louvres for a while so the glass can dry, and wipe any water off the steel. If your frames already show rust or flaking paint, treat and repaint them before the shutters go on, because reaching them afterwards is far fiddlier.
The louvres do a lot of the day-to-day work. Tilt them partway and you cut glare and block the view in from the street, while still letting daylight reach the room. That means light without being overlooked by neighbours, which is a real plus on large, uncurtained panes of glass.
Shutter World fits with its own team, so the person who measured your windows is part of the same process that fits them. On the day, expect the fitters to check clearances around handles, opening lights and glazing bars, fix the frames to the surround, and adjust the panels until they close evenly with consistent gaps. It is worth watching a panel swing shut once the work is done, and opening each casement behind it to confirm the handle clears.
Before any of that, ask for a clear quote. It should state the fit type (face fit or inside fit), the frame style, and any extra work such as battens or filler. If a line is vague, ask what it covers.
There is no need to rush. Measure honestly, compare face-fit and inside-fit options, and decide when the numbers and the look both make sense. If you would like a second pair of eyes, you can book a design visit and treat it as information gathering, not a commitment.